Tuesday, November 26, 2013

Thanksgiving feasting

This is just a quick post with links to recipes I'll be using for our Alley Thanksgiving meal in case you need a last minute guaranteed good recipe!

Let's start with dessert first...
http://www.fostersmarket.com/recipe/french-silk-pie/

and

http://www.bonappetit.com/recipe/crack-pie


Now for main meal recipes (Chris is in charge of deviled eggs so I don't have the recipe for that.)
http://m.foodnetwork.com/recipes/81503

http://thepioneerwoman.com/cooking/2007/07/fresh_corn_cass/ (I'll add panko and parmesano reggiano on top)

http://m.foodnetwork.com/recipes/29720 (I'll add some garlic and bay leaves while potatoes are boiling. And I normally put a little grated nutmeg after I add the milk.)

http://thepioneerwoman.com/cooking/2007/11/stuffing_dressing_my_favorite_thanksgiving_food/

http://savoryspoon.blogspot.com/search/label/Turkey?m=0 (There are a few posts here since the turkey is so involved.)

http://thepioneerwoman.com/cooking/2007/11/pw_dinner_rolls_-_no_kneading_required/


Appetizer...
http://www.cinnamonspiceandeverythingnice.com/copycat-bang-bang-shrimp-recipe/


Breakfast for Thanksgiving morning...
http://www.southernliving.com/m/food/holidays-occasions/mothers-day-brunch-00400000010690/ (I'll be skipping the bread part and just putting one bag of croutons in the bottom of a buttered casserole pan and following the recipe from there.)

I think that's it!
HAPPY THANKSGIVING!

Monday, August 13, 2012

Baked Four Cheese Grits

Even though I wasn't born in the South, I eat like a Southerner. One of my favorite southern foods besides fried okra is grits. I don't really care how they are fixed...white, yellow, cheesy, buttery, spicy...I will eat them! I went to a brunch shower my friend last weekend and I was supposed to bring hashbrown casserole or some type of grits. The decision of what to fix was not hard...grits, of course!

I have my own recipe for how I like to make grits if I'm putting some kind of meat on top. However, I needed to make a lot of grits with no meat on top. I've tried Paula Dean's recipe for Baked Garlic Cheese Grits and they weren't exactly what I wanted. Honestly, they had too many eggs in them which made them more like an egg, grits casserole. I'm not at all saying I'm a better cook than Paula Deen, however, I'm not always as impressed by her recipes as I am everyone else. I think there are a lot better recipes out there!

So, all that to say, I decided to wing it and create my own Baked Cheese Grits recipe. I really hope you enjoy it! And, if you attended the shower and these taste different at all, it's because I'm kind of guessing on the amounts since I didn't follow a recipe ; ).

Baked Four Cheese Grits

2 cups stone ground yellow grits (I use Bob's Red Mill Corn Grits or their Course Ground Cornmeal. Please don't use cheap white grits!)
3 cups chicken broth (I use 3 cups water and 3 teaspoons of Better Than Bouillon. I think it has a much better flavor than canned or boxed broth. You can also buy boxed chicken stock because it has great flavor but you'll get a ton more uses out of the Better Than Bouillon jar.)
3 cups whole milk
1 cup heavy cream
2 garlic cloves (peeled and cut into halves...needs to be easy to scoop out of the liquid)
2 teaspoons salt
2-3 teaspoons black pepper
1/4 teaspoons or more of Cajun seasoning (optional...I just had some I got while we were in Denver so decided to throw it in.)
8oz. Cabot extra sharp white cheddar cheese, shredded
4oz. Smoked Gouda, shredded (Lowe's Foods has small 4oz blocks that are $2-$4.)
2 oz. cream cheese or mascarpone cheese
4 tablespoons real unsalted butter (not margarine)
1/4-1/2 cup heavy creamy for consistency
1 egg, beaten
1/2 cup sharp yellow or white cheddar, shredded

Preheat oven to 350 degrees.

In a medium saucepan on medium-high heat, add the milk, chicken stock, 1 cup heavy cream, garlic cloves, and salt. Bring it to a boil stirring often to make sure the milk is not burning on the bottom of the pan (Tip: rinse your saucepan in cold water before using it and dump out all of the water but do not wipe it out. This will prevent the milk from sticking). Once it is boiling, quickly remove the garlic cloves and discard. Then, slowly add the grits. Using a whisk, mix it into the liquid. Once all of the grits are well mixed into the liquid, decrease the heat to low and cover with a lid. You must remove the lid and stir frequently (every 2-3 minutes) to keep the grits from sticking to the saucepan. Continue with this process for 8-15 minutes until it is creamy. Remove from the heat.

Season the grits with the cajun seasoning and pepper. Stir in the white Cheddar and Gouda until melted. Then, add the cream cheese or mascarpone and butter. At this time, taste to make sure the amount of salt and pepper are good for your taste. Whisk in the egg. Be sure to whisk quickly as you add the egg so it doesn't cook. If you want to add a little more creaminess, add 1/4-1/2 cup more heavy cream. Pour into a greased 9x13 pan and top with the yellow or white cheddar. Bake in oven for 30-35 minutes.

Enjoy!

Wednesday, August 1, 2012

Best Spinach Artichoke Dip!

I LOVE spinach artichoke dip. When I say love, I mean I could probably eat a whole dish in one sitting. I've probably tried more than 10 recipes and this one is the best. I got this from someone at our church who made it for our friend's baby shower. I HAD to have the recipe and now I'm passing it on to you. Yes, you should feel special ; ). Trust me, it is so good. I mean, how could it not be when it has a whole thing of cream cheese in it? I hope you enjoy!

1 can artichoke hearts, drained and chopped
1 box frozen spinach (thawed and drained...I put mine in a colander and run hot water over it for a quick, easy thaw and then squeeze out the liquid in my hands)
1/2 c mayo (the good stuff)
1/2 c sour cream
1 c parmesan cheese
8oz. pkg cream cheese
2 cloves of garlic, finely minced
salt/pepper to taste
lemon juice to taste

Mix  all ingredients together, top with a little of the parmesan cheese. Bake at 350 for 20 minutes.

Wednesday, April 25, 2012

Thrifty Thursday: Tomato Basil Soup

This is definitely a go-to cheap, easy dinner for our family. I normally just do grilled cheese using cheap bread with white american cheese to go with the soup. However, tonight...we are going a little fancy. My friend, Marissa, made "grown-up" grilled cheese for a church event a few weeks ago. She gave me a few tips...good bread, two kinds of cheese, and some other fun ingredient (bacon, ham, fried egg, etc.). Tonight, I'm doing a three cheese Semolina bread (from HT), crispy bacon, good white American cheese and a sharp white cheddar. The other tip Marissa gave is not only to spread butter on the outside of the bread but to also sprinkle it with Parmesan. I'm super excited about trying that! I'll let you know how it turns out.


Tomato Basil Soup

2 28oz cans of Furmano's chunky crushed tomatoes (with basil, garlic, and oregano...do not substitute this for any other crushed tomatoes!)
1 14oz can chicken broth or stock
1 cup whipping cream (or light cream to be healthier)
1/2 cup butter

In a saucepan bring the tomatoes and broth to a boil. Reduce heat, cover and simmer for 10 minutes. Reduce heat to low and stir in butter and cream. Cook until butter is melted.

This is super easy and SO good! You could also double it and freeze a batch for a fast dinner.

Adapted from Allrecipes.

Monday, April 23, 2012

Easy Peasy Sweet and Savory

Last night, we had our first meeting for our trip to Nicaragua. I'm leading a trip with our church to Managua in July to go and serve at One by One ministries. Check out what they are doing down there here http://www.theinnocent.org/index.htm. I'm so pumped about what God is doing through this ministry and can't wait to see it first hand in just a short couple of months. My sister and her family are the instate contacts for this ministry as well. Check them out here http://lebretfamilymissions.blogspot.com/p/about-us.html. Let me give you some incentive to click on that link. They have 7 sweet kids! Thats right...seven! And, they are extremely cute!

Ok, let's get on with what you came here for...the food. My good friend, Mary, made soup and I was in charge of bread and dessert. I really wanted something easy since I had been at church all day and this last week was one of the busiest weeks I've had in a long time. I stumbled upon this bread recipe as I was searching for something cheesy and easy. It will definitely be going in my permanent stash of yummy things to make last minute. The sweet recipe was given to me by someone at church. I tweaked it some because I wanted a few different things in it. You will see. Here we go...


Parmesan Cheddar Quick Bread
1 3/4 cups all-purpose flour
1/4 cup white sugar
2 1/2 teaspoons baking powder
1 teaspoon salt
1 cup shredded Cheddar cheese (I used sharp white cheddar by Cabot) with a little extra for the top - the original recipe called for 1/2 cup but next time I would definitely do a full cup
1/2 cup parmesan shredded cheese
1 egg, beaten
3/4 cup milk
1/3 cup vegetable oil

Things I added...
2 tsp. garlic powder
2 tsp. Italian seasoning

For the top...
1/2 stick of butter melted and mixed with about a tsp. of garlic powder and a tsp. of kosher salt

Directions
Preheat oven to 400 degrees F (200 degrees C). Lightly grease a 9×5 inch loaf pan.
In a large bowl, mix together flour, sugar, baking powder, salt, garlic powder, italian seasoning, and cheese. 
In another large bowl, beat together egg, milk and oil. 
Stir the flour/cheese mixture into the egg mixture, stirring until just moistened (don't over stir)
Pour batter into prepared loaf pan. Sprinkle extra cheese on top.
Bake in preheated oven for 25-35 minutes, until a toothpick inserted into center of loaf comes out clean.

Once it comes out pour the melted butter mixture over the top and spread it around. Slice and serve with extra melted butted mixture if you want to be extra crazy!


Magic Bars (or seven layer bars)

Here are the original ingredients and then I will give you my recipe below that. You can really do any fun candies that you want. Get creative!
1 cup sweetened flaked coconut
8 tablespoons (1 stick) unsalted butter
1 1/2 Graham cracker crumbs (I bought the expensive store bought to make it super easy...sometimes that is worth it.)
1 cup finely chopped walnuts
1 cup semisweet chocolate chips
½ cup white chocolate chips
½ cup butterscotch chips
1 (14-ounce) can sweetened condensed milk

My changes...
1 cup sweetened flaked coconut
8 tablespoons (1 stick) unsalted butter
9 graham crackers (5 ounces), crushed
1 cup finely chopped pecans
1 cup dark chocolate chips
½ cup toffee bits
½ cup butterscotch chips
1 (14-ounce) can sweetened condensed milk

- Preheat to 350°F. Spray a 9×13-inch baking pan with non-stick spray. Line the pan with two overlapping pieces of foil or parchment paper, leaving overhang to act as handles for lifting the bars out of the pan. Spray with a lot of non-stick spray.
- Spread the coconut on a baking sheet and bake until the flakes are a golden brown about 4-7 minutes. (Keep a close eye on it – coconut can go from slightly browned to burnt in a matter of seconds.) Set aside.
- Melt the butter and combine with graham cracker crumbs in a small bowl. Toss with your fingers until the butter is evenly distributed. Press the crumbs evenly onto the bottom of the prepared pan.
- In order, sprinkle the pecans, chocolate chips, toffee chips, butterscotch chips, and coconut over the graham crumbs. Pour the condensed milk evenly over the entire dish.
- Bake until the top is golden brown, about 25 minutes. Cool in the pan on a wire rack to room temperature, at least 2 hours.
- Remove the bars from the pan using the foil or parchment handles and transfer to a cutting board. Using a sharp knife, cut into bars or squares.

ENJOY!

Tuesday, March 6, 2012

Dark chocolate layer cake with chocolate ganache and caramel buttercream

Here are the recipes/ingredients I used for Chris' 30th birthday cake...

For the cake part, I used this recipe. I used cake flour instead of all purpose and since it was a special cake I bought nice cocoa from Whole Foods.

For the caramel buttercream...

1.5 sticks of unsalted butter
1/2 cup of Trader Joe's Fleur de Sel Caramel Sauce
2-4 cups powdered sugar
1 tsp. Vanilla
3-4 tbsp. heavy cream
Whip the butter in a stand mixer for about 3 or 4 minutes. Add the caramel and whip to combine. Begin adding powdered sugar until it is the consistency you like. Then, add the vanilla. Add some cream to help the texture to be silky and smooth : ).

For the chocolate ganache layer in the cake and on the very top of the cake as well as the frosting, I used this recipe.
I used just straight ganache for the middle layer in the cake and to pour over the top of the completed frosted cake. For the frosting, I whipped it in the mixer. However, I didn't love the consistency. So, I added about 3/4 cup of powdered sugar and 4 tbsp of cream before using it to frost the cake.

To assemble I did...
Cake layer
Caramel buttercream layer
Drizzle of the leftover caramel sauce
Cake layer
Chocolate ganache
Cake layer
Caramel buttercream
Drizzle of the leftover caramel sauce
Cake layer

Then I cover the cake with the frosting and the ganache. To top with the ganache, spoon it onto the center of the cake and begin to push it towards all the sides so that it starts dripping down. I also finished the cake off with some of the drizzled caramel, a caramelized candy round, and 3 truffles made from the leftover ganache.

For the caramelized decor, heat the caramel on the stove till boiling and let it boil for a couple of minutes until extremely hot. Then, working quickly, drizzle with a spoon onto wax paper in circular motions.

I can't figure out to upload a picture onto this post from my iPad. So, as soon as my hubby gets home with his computer, I will post some pics.

Friday, August 12, 2011

Salsa lovers

My husband and I are huge salsa lovers. We have two favorite restaurant salsas that can't be topped...Chili's and Barberito's salsa. Since we live in Raleigh, we can't get Barberito's salsa which is terribly sad. We get Chili's on occasion but not that often since we try not to eat out to save money. So, I've been on a search for a salsa that I can make at home that will satisfy our cravings and not cost $5-6 for a small jar. If this is you, well, look no further this will be the last salsa that you make. It is amazing! Once again, Pioneer Woman, has come through for me. She really needs her own show. I'm just waiting for it. Maybe she already has one that I don't know about? Anyway, I must stop typing and get to the good stuff. Here you go. Prepare to be addicted.

1 can whole tomatoes (28oz)
2 cans Rotel (10oz)
1/4 cup chopped onion
3 cloves garlic, roughly chopped
1 jalapeño, quartered and sliced thin
1/4 tsp salt
1/4 tsp cumin
3/4 cup cilantro
Juice from half a lime

I have tweaked just a few things. So, here is the link to her original recipe in case you want to check it out. http://thepioneerwoman.com/cooking/2010/01/restaurant-style-salsa/

Now, let's start the steps. This makes a ton of salsa so you will need a 12 cup food processor or you will need to blend it together in batches. Trust me, it is worth every second of your time! Place everything in processor and pulse till desired consistency (about 10-15 pulses). I store my salsa in mason jars for easy pouring. I'm not positive how much this makes because we end up eating quite a bit right when it is done. If I had to guess, I would say about 2 quarts.

Tips:
Tomatoes - I've had a lot of fresh tomatoes from The Produce Box. So, instead of buying a can of whole, I just use fresh. I use about three tomatoes if they are really large and 5-6 if they are small or roma size tomatoes. You will need to remove the skin before putting them in the food processor. Here is a link to show you how to do that. http://allrecipes.com/HowTo/peeling-tomatoes/detail.aspx
Jalapeño - For really spicy, leave in all ribs and seeds. For medium, cut the jalapeño in half and remove seeds and ribs from only one half. For mild, remove all seeds and ribs from jalapeño.
Garlic - I love garlic and do not agree with Pioneer woman that there can be too much in the salsa. So, I use my micro plane grater on one clove (so the garlic flavor is more intense) and roughly chop the others. I do like to have sone roughly chopped for texture.
Onions - I love onions but totally agree with pioneer woman that this is all you need for this salsa so don't add any!

Friday, January 28, 2011

All I can say is...WOW!

Hi everyone! It has been a while since I've been around. We became a family of five on December 27th when we welcomed Knox Canaan into this world. We are absolutely in love! So, needless to say, I haven't been cooking as much as I would like to be. I'm excited about getting back to cooking and trying new recipes. I think the best way to start back is with this YUMMY dessert! Trust me...make this ASAP!

Smores Bars

2 sticks butter, softened to room temperature
1/2 cup brown sugar
1 cup sugar
2 large eggs
2 tsps. vanilla
2 2/3 cups flour
1 1/2 cup graham cracker crumbs (about 14 full graham crackers)
2 tsp. baking powder
1/2 tsp. salt
6-8 Hershey chocolate bars
3 cups marshmallow fluff (that’s roughly one 16-oz. tub of marshmallow fluff)

Makes a 9x13-inch pan of bars

Lightly grease the baking pan and line it with parchment paper, so the paper hangs over the sides a little. (The parchment will make it really easy to air lift the bars out of the pan if you want to.) Set it aside.

In a mixer, combine butter and sugar and mix until fluffy. Add in the vanilla and the eggs. In a separate bowl, sift together the flour, graham cracker crumbs, baking powder, and salt. Slowly, add the flour mixture into the butter mixture. Mix until it is combined.

Gather the dough into a ball. Divide it in half with a knife. Take one half, put it in your prepared pan, and smoosh it down so that it covers the entire bottom of the pan completely in an even layer. Then, unwrap all your chocolate bars. Cover the dough with a single layer of chocolate, cutting the bars as needed to fit your pan and so as much of the dough is covered. Next, cover the chocolate in an even layer of marshmallow fluff.

Take the other half of the dough and (using a rolling pin) roll it out flat (flour the board lightly, if you want, to make it easier to get the dough off). Make it roughly the same size and shape as your pan, so you know it’ll be big enough to cover the whole top. Then, slice it into strips. Take each strip, one at a time, and place it on top of the fluff covering it completely. It will be a little messy but that is ok!

Place the pan into your preheated oven. Bake at 350 degrees for about 30-35 minutes, until the top is golden brown.

YUM YUM!

Saturday, August 28, 2010

These are a few of my favorite things...


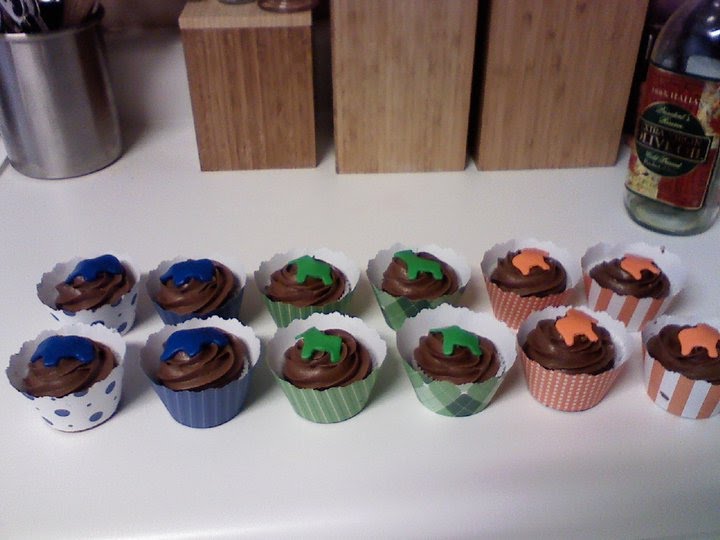
Cupcakes are definitely on my list of favorite things! I just love them. If I had the time, I think I would make them everyday. Here are some pics of the last ones that I made for a friend to take to her friend's shower.

Friday, August 27, 2010

Yummy Treats

Last night, at my church, we had a Ladies Night Out. It was absolutely wonderful. First of all, walking out the door without kids was so sweet. Then, I got to spend the evening worshiping and learning about my Savior while getting to fellowship and laugh with a bunch of sweet ladies. It was absolutely delightful! We had cookies and coffee to make the night even sweeter. I made Paula Deen's Chocolate Gooey Butter Cookies. Oh my word. They are so amazing! It isn't very often that I make cookies using a box mix, but trust me, these are worth it. Then, I made one of my all time favorite cookies...snickerdoodles. And, these snickerdoodles, are just the perfect texture. You really should try these. You will not be sorry!

Snickerdoodles:
2 3/4 cups flour
1 teaspoon baking soda
1/2 teaspoon salt
1/2 cup shortening
1 stick unsalted butter, softened
1 1/2 cups sugar, plus 3 tablespoons
2 large eggs
1 tablespoon cinnamon

Preheat the oven to 350 degrees F.
Whisk (really good...a couple of minutes) the flour, baking soda, and salt in a bowl.

Beat together the shortening and butter. Add sugar and continue beating until light and fluffy, about 5 minutes. Add the eggs, 1 at a time, beating well after each addition. Add the flour mixture and blend until smooth.

Mix the 3 tablespoons sugar with the cinnamon in bowl. Roll the dough, by hand, into 1 1/2-inch balls. Roll the balls in the cinnamon sugar. Place them on an unlined cookie sheet or a baking stone, spacing them evenly. Bake until light brown, but still moist in the center, about 12 minutes. Cool completely on a wire rack.


Paula Deen's Chocolate Gooey Butter Cookies:

1 (8-ounce) brick cream cheese, room temperature
1 stick unsalted butter, at room temperature
1 egg
1 teaspoon vanilla extract
1 (18-ounce) box moist chocolate cake mix (I used betty crocker's double chocolate fudge.)
Confectioners' sugar, for rolling

Preheat oven to 350 degrees F.
In a mixer, cream the cream cheese and butter until smooth. Beat in the egg. Then beat in the vanilla extract. Beat in the cake mix. Cover and refrigerate for 2 hours to firm up so that you can roll the batter into balls (I didn't do this because I didn't have the time and it was fine...just messy). Roll the chilled batter into tablespoon sized balls and then roll them in confectioner's sugar. Place on an ungreased cookie sheet, 2 inches apart. Bake 12 minutes. The cookies will remain soft and "gooey." Cool completely.

Tuesday, July 20, 2010

Garlic knots

Hmmm...garlic, I love it! Here is a great snack for a party or as a side item to go with spaghetti or baked ziti. These measurements for the ingredients are estimates. I just kind of put however much looks right, but I tried to come up with amounts for you in case you like to measure everything.

20 canned refrigerator biscuits (I buy the extremely cheap store brand that come with the four cans in one pack. They are only like $1 or $2 and I think they work the best.)
1 stick butter
6 garlic cloves (finely minced or use handheld grated)
1/2 cup parmesan
salt, to taste

Take each biscuit and, using scissors, cut them in half. Then, roll each piece into a log or snake shape and twist into a knot. They will be small. Place them all on a greased cookie sheet and cook until lightly golden (on temperature on can). They do not spread much so you can put them pretty close together. Place all the knots in a large bowl.

In a microwave safe container, place the butter and the garlic. Put in the microwave just until the butter is melted. Pour the butter over the knots and toss. Then, toss in the parmesan cheese. Sprinkle with salt.

Saturday, July 17, 2010

I promise some new recipes soon...

But for now, here is another giveaway that is food related : ). I've actually never made my own baby food. But, with our third, I would love to try! I like the idea of the food being fresh and good for the baby and hopefully, cheaper. Here is a giveaway for a baby food starter kit! Check it out http://www.babywisemom.com/2010/07/product-review-fresh-baby-giveaway.html

Monday, July 12, 2010

Giveaway

Go to this blog to enter into a giveaway from Pitter Patter Art. She makes some adorable stuff and has two giveaways this week...a customized tshirt and a customized key fob. Seriously, they are so cute!

Wednesday, June 30, 2010

My favorite thing

I LOVE hummus! I mean, really, I could eat it every day for breakfast lunch and dinner! So, here is the recipe that I have come up with to make at home since I'm not a fan of hummus at the grocery store. However, if I do buy hummus, I buy it from Trader Joe's. They have the best store bought hummus, by far. Now, if you want AMAZING hummus that tastes just like it would if you were sitting in a restaurant in Israel, go to the Pita House in Greenville, SC. Ridiculously delicious!

I actually talked to the owner of the Pita House and he told me all of the ingredients that they put into their hummus. However, he laughed and said that he can't even recreate it at home the same as the Pita House because they make it in such a huge batch. That made me feel a little better about how far mine tastes from theirs : ).

16 ounce can of garbanzo beans and 1/2 cup reserved liquid (Or you can buy dry, which will taste better and soak and cook them overnight. Here is a great step by step on how to make hummus with dry beans.)
3-5 tbsp fresh lemon juice
3 cloves of garlic, crushed
1/2 tsp salt
2 tbsp EVOO
1/2 cup tahini (can find in all grocery stores near the olives usually)

Combine chickpeas, lemon juice, garlic, salt, and evoo in the food processor. Add 1/2cup of liquid from the can of chickpeas. Then, add 1/4 cup of the tahini. Taste and decide whether you want more Tahini taste or not. I usually prefer more but everyone is different. Add the rest of the Tahini if desired. You also might need to add more salt. Making hummus is definitely a taste as you go thing!

Memories of Keifer's

So, probably seven years ago or more, I went to Jackson, Ms with a friend from college. She took me to the most fabulous place...Keifer's. If you are EVER in the area, you must go there. The best part about Keifer's is their feta cheese dip. It is absolutely amazing! I've only eaten there once and I still dream about this feta yumminess!

Yesterday, my mouth was watering for it. Obviously, it is a little far to drive for me. So, I thought I would try to create something that is similar. This is in NO way as good as Keifer's, but it is good and will satisfy my craving somewhat.

2 cups Feta cheese
1/2 cup thick greek yogurt (I use full fat)
heaping 1/2 cup of mayonnaise
1/4 cup red wine vinegar
3 garlic cloves (minced)
1 tbsp Worcestershire sauce
2 tbsp EVOO
pepper to taste (and maybe salt but be careful because Feta is a salty cheese)

Combine everything in a food processor and pulse until combined. You want to have a few chunks of feta cheese. Next time, I might try cutting the red wine vinegar in half. The original recipe calls for 1/2 cup and I used a 1/4 cup when I made it. It stills seems like too much. The vinegar still overpowers the feta taste just a bit. So, I would suggest combining everything except for the vinegar and then just add a Tbsp at a time until you like the taste.

I had this on pita bread with Trader Joe's hummus since I didn't have the energy to make my own. It was a great lunch!

Sunday, June 13, 2010

My first three tiered cake!

Recently, for my son's birthday party, I decided to try and make fondant. It went pretty well. It was by no means perfect, but it was cute and I was pleased with it. I did a two layer cake...one layer chocolate and and the other white cake with strawberry filling and buttercream.


I attempted to make the balls all different sizes. I thought it would look whimsical and cute. No, it just looks like I couldn't get them the same size. I won't do that again : ).

My neighbor's little boy turned one this weekend and I volunteered to make his birthday cake. This time it was a three layer cake. The top layer of the cake his mom made (she wanted a carrot cake for him) and then I decorated it. The bottom two layers I covered in marshmallow fondant (MMF). The bottom layer is just regular MMF and the second layer is chocolate MMF. I'm going to post the recipes below for the chocolate cake and chocolate buttercream along with the white cake and the vanilla buttercream that I used for the first two layers. I'm telling you, you should make extra of the buttercream because you will be taking lots of spoonfuls of it for yourself. I have some in the fridge right now that is calling my name! Then, I will post the the MMF recipe. I'm going to hold off on the chocolate marshmallow fondant until I try to make it again using melted chocolate instead of cocoa. I had a little trouble with it cracking and hoping the melted chocolate will solve that. I am thinking the cocoa is just too dry. I will try to make it one day this week to see what happens!


This picture is not great. My camera was not liking the lighting in the room. Also, the bottom of the cupcake layer was a little soft and started bubbling up. All in all, I was very excited about this cake. I can definitely see a huge improvement from my boy's cake to my neighbor's cake.

Chocolate cake from Paula Deen's Lip Smackin' Chocolate Peanut Butter cake (Seriously, I've made a lot of chocolate cakes because my husbands is obsessed and this is BY FAR the best, most moist cake recipe I've ever made):
1 cup (2 sticks) butter, softened
2 cups sugar
3 large eggs
1 3/4 cups cake flour
1 1/4 cups Dutch process cocoa (use Hershey's DARK cocoa, trust me)
2 teaspoons baking soda
1/2 teaspoon baking powder
1/2 teaspoon salt
1 1/4 cups buttermilk
1 teaspoon vanilla extract

1. Preheat oven to 350F. Grease and flour 3 (9-inch) cake pans (I used 8 inch and only did 2 of them).
2. In a large bowl, beat butter and sugar with an electric mixer until fluffy. Beat in eggs, one at a time, beating well after each addition.
3.In a medium bowl, combine flour, cocoa, baking soda, baking powder, and salt; sift 2 times (I don't have a sifter so I just use a whisk and blend well).
4.Add sifted flour mixture to butter mixture alternately with buttermilk, beginning and ending with flour mixture. Stir in vanilla.
5.Pour batter into prepared cake pans. Bake 33 to 38 minutes, or until a tester inserted in center comes out clean. Cool cake in pans on a wire rack 10 minutes. Remove from pans and cool completely on wire rack.

Chocolate Buttercream
1 cup (2 sticks) unsalted butter, softened (You can also do half butter and half shortening but only do this if you buy organic shortening.)
1/2 cup cocoa
1/4 cup dark cocoa
1 teaspoon vanilla extract
4 cups sifted confectioners' sugar
3-4 tablespoons milk
In your mixer, cream shortening and butter. Add cocoa and vanilla. Gradually add sugar, one cup at a time, beating well on medium speed. Scrape sides and bottom of bowl often. When all sugar has been mixed in, icing will appear dry. Add milk and beat at medium speed until light and fluffy. Keep bowl covered with a damp cloth until ready to use. For best results, keep icing bowl in refrigerator when not in use. Refrigerated in an airtight container, this icing can be stored 2 weeks. Rewhip before using. For thinner icing, continue to add milk one tbsp at a time until you reach the consistency that you like.
For a mocha buttercream, you can substitute cooled strong brewed coffee for the milk.

Marscapone White Cake from Giada's Marscapone Mini Cupcakes
8 ounces mascarpone cheese (about 1 cup)
2 egg whites
1/4 cup vegetable oil
1 box white cake mix
1 cup water
Preheat the oven to 350 degrees F.
In a large bowl combine the mascarpone cheese, egg whites and vegetable oil. Using a hand mixer, beat the ingredients until combined and creamy. Add the cake mix and water and mix until smooth, about 3 minutes. This recipe will make ONE ten inch round cake (probably would make 2 8-inch round cakes) so you will need to make this recipe twice to make the bottom layer of the cake I made. Remove from the oven, let cool slightly in the pan then transfer to a wire rack to cool.

Vanilla Buttercream (This is what is in my fridge that I'm getting ready to go and eat!)
3 cups confectioners' sugar
1 cup butter
1 teaspoon vanilla extract
1 to 2 tablespoons whipping cream
In mixer, mix together sugar and butter. Mix on low speed until well blended and then increase speed to medium and beat for another 3 minutes.
Add vanilla and cream and continue to beat on medium speed for 1 minute more, adding more cream if needed for consistency that you want.
I have used this recipe and replace the vanilla extract with strawberry extract and it is delicious! I colored it pink and used it to top cupcakes.

Marshmallow Fondant (I got this recipe from my friend, Melissa. I'm not sure where she got it. She's been taking cake decorating classes so I'm guessing that is where she picked it up.)
8 cups of mini marshmallows
3 Tbsp of water
1 Tbsp of Flavor (Vanilla extract, Strawberry extract, etc.)
7 cups powdered sugar (You'll want to have about 1/2 cup extra just in case you need it)
2 heaping Tbsp of shortening (I get organic shortening at Earth Fare) and more because you’ll use to grease your work space


Thoroughly grease bowl and dough hook of mixer with shortening. Place 6 Cups of powdered sugar in mixing bowl. Make a well in the center of the powdered sugar. In a microwave safe bowl, put marshmallows, water, flavor, shortening.
Heat up marshmallow mixture for 30 seconds. Stir and continue to microwave for 30 second intervals until the marshmallows are almost melted. They will look soupy with some lumps. At this time, you can add food coloring if you like. I think you should go with Wilton's icing colors . You can find them at Walmart for $1.50. It doesn't take much! I use a toothpick and just dab a couple of dots on the marshmallow mixture and stir. Then, I add more if needed to reach my desired color.
Pour marshmallow mixture into the well of the powdered sugar. It’s going to spread out and cover all the sugar basically, but it helps for it to be in the middle of it.
Put 1 More Cup of powdered sugar on top of the marshmallow mixture.
Set mixer on slow speed until everything is incorporated and then set it on 2. Don't scrap mixture off the side of bowl.
Touch mixture to see if it is sticky and if it is add about 1/4 cup of powder sugar.
Grease working area and your hands. Put mixture on surface and kneed for a few minutes.
Wrap the ball of fondant in plastic wrap and allow it to sit for at least 8 hours at room temperature. I try to make mine a day in advance.
Use the left over sugar to kneed into your mixture if you need it. Once you know how fondant is suppose to feel (not sticky, but pliable and not dry and crumbly) this is a very simple non-messy recipe to use.

Friday, May 28, 2010

Lime Chicken Tacos/Burritos with Cilantro Lime Rice

Here is wonderful crock pot recipe for Lime Chicken Tacos/Burritos. It is very easy, cheap, and delicious! I got it from my friend Terra over at Barefoot conTerra who got it from a friend of hers. I only used two chicken breasts (because that is all I had) and it made just enough for my family. Of course, we loaded our tacos/burritos up with the Cilantro Lime Rice, sour cream, cheddar cheese, and tomatoes as well. You could also flavor up some black beans to put in the burrito as well.

1-1/2 pounds boneless skinless chicken breasts
3 tablespoons lime juice
1 tablespoon chili powder
1 cup frozen corn
1 cup chunky salsa
flour tortillas (The size depends on if you want tacos or burritos. I make tacos for the boys and my husband and I make burritos)

Place the chicken in the crock pot. Combine lime juice and chili powder; pour over chicken. Cover and cook on low for 5 hours.

Remove chicken. Using two forks, shred the chicken and return to the slow cooker. Stir in corn and salsa. Cover and cook on low for 45 minutes.

Cilantro Lime Rice
I really wanted Cilantro Lime rice tonight for some reason. So, I looked around on the internet for a recipe. This is a couple recipes put together. If you follow the instructions on how to make the rice, you will be so thankful! This rice is so fluffy and wonderful!

1 c. basmati rice or other long-grain rice
2 tsp. olive oil
1/2 tsp. salt
1 3/4 c. water
1/4 cup finely chopped fresh cilantro
2 Tbsp fresh lime juice
2 Tsp. lime zest

Bring water to boil in a medium saucepan. Add olive oil, rice, and salt. Stir just to make sure the grains are separate, then cover and bring to a simmer. Simmer over low heat for about 17 minutes. Check on it at 10 minutes to see how it is doing. You want to cook just until the water has evaporated. When the timer goes off for the rice, remove the rice from the heat, remove the lid, place a couple paper towels over the pan, and replace the lid. This will catch the steam and keep the rice from getting sticky. Let the rice sit for about 10 minutes with the paper towels and lid on.

Remove the lid. Using a fork, fluff the rice gently.

Toss in cilantro, lime zest, and lime juice. Stir gently, just to combine.

Monday, May 24, 2010

Big news!

Most of you that read this blog already know that we are having a BABY!! I just wanted to let you all know that I'm not done posting on this blog. I know it seems like it since I haven't posted in a while. But, I honestly haven't been cooking a ton and have been using my crock pot quite a bit. I have been nauseous and tired. So, hopefully in a few weeks, I will be back to my old self and feeling like cooking again. And then, I can get back to posting. I miss enjoying the smell of food!! If I come across an awesome crock pot recipe over the next few weeks, I will post it for you. If you have an awesome crock pot recipe to pass along to me, please do!

Thursday, April 22, 2010

Thrifty Thursday: Hungry Girl's Crispy Chicken Sanwich (tastes like Chick-fil-a)

Ok...I am pretty sure that I haven't posted about this recipe. But, if I have, it totally deserves two posts. These sandwiches are AMAZING! You are going to think I am crazy, but they really do taste like Chick-fil-a's chicken sandwiches. Just get them a try...trust me!

If your chicken breasts are really thick, you will want to cut them on the horizontal to make two thin chicken breasts. I do this because thick cuts of chicken freak me out but you don't have to do it : ). If the thin sliced chicken breasts are on sale, then I buy those. Then, I cut my chicken breasts (after they have cooked) in half horizontally. So, out of every chicken breast, you will get two sandwiches. I don't like to have my chicken hanging over my bun so this is why I cut mine in half horizontally. Then, they will fit on the bun. Also, the perdue individually packed chicken breasts are the perfect thickness for this sandwich. They are pretty expensive, but sometimes you can find them on sale.

Now, for the best part! One sandwich is ONLY 283 calories and 3.75g of fat (Chick-fil-a's sandwich is 410 calories and 16g of fat!! AND, if you are going on a trip or are just in a hurry and need your dinner to go, you can wrap these in foil and take them in the car. I am telling you...these are AMAZING!


Hungry Girl's Crispy Chicken Sandwich
1 1/2 cup Fiber One bran cereal (original)
Dash each salt, black pepper, garlic powder, and onion powder, or more to taste
1/2 cup fat-free liquid egg substitute (like Egg Beaters Original or you can use egg whites)
1/2 to 1 pound boneless skinless lean chicken breast (depending on how many sandwiches you want to make)
fat-free mayonnaise
hamburger buns (light, if available)
tomato (optional...I usually don't use them because I like it to taste just like Chick-fil-a
dill pickles (extra for me!)
romaine lettuce (again, I don't usually use this)

Preheat oven to 375 degrees.
Using a blender or food processor, grind Fiber One to a breadcrumb-like consistency. Season the crumbs with as much salt, pepper, onion powder, and garlic powder as you like, and mix well. Place crumbs in one small dish and egg substitute in another.
Sprinkle both sides of the chicken with a dash each of salt and pepper. Then, coat chicken on both sides—first with egg substitute, and then with seasoned crumbs.
Place chicken on a baking sheet sprayed with nonstick spray. Top chicken with a light mist of nonstick spray
Bake in the oven for 10 minutes.
Flip the chicken over, and add another light mist of nonstick spray. Cook for an additional 10–12 minutes, until chicken is fully cooked and coating looks crispy.
Spread mayo on each half of the bun. On the bun bottom, place chicken, tomato, pickles, and lettuce, and then top with the other half of the bun. Enjoy!

Friday, April 16, 2010


I posted this recipe on my other blog wonderfullysavedbygrace.blogspot.com last year. I thought I would share it on here since it is SO yummy! My husband and I love the Alfredo Pesto Ravioli from Maggiano's. So, I thought I would try to recreate it. I had a surprise date night for him. I told him that I picked it up from Maggiano's and he totally bought it. I don't know if it is that good but give it a try and let me know what you think. Of course, a few bites in I told him that I made it : ). This would be a great meal to fix for your man as a surprise date night! I made stuffed mushrooms to go along with it.

Pesto Sauce (you can always buy store bought but i don't think the sauce will turn out as good)
In a food processor, blend:
1 cup fresh basil (or you can use cilantro...i prefer basil for this dish)
1/2 cup pecans (or you can use pine nuts but I like pecans much better in pesto)
5 garlic cloves
1/2 cup asiago cheese (or parmesan)
coarse ground black pepper (about one tsp)
salt

Gradually add 1/4 cup to 1/2 cup evoo until desired consistency (thick paste). You will want to taste and add salt and pepper as you like. Then, set pesto aside.

Alfredo Sauce
2 1/2 cups of heavy cream
1 1/2 sticks of butter (12 tbsps)
1/2 cup fresh lemon juice or a couple tsp. of concentrated lemon juice
1 cup grated parmesan cheese
1 cup asiago
2 tsp. lemon zest
1/2 tsp. nutmeg
1/2 tsp. white pepper
salt to taste

In a large skillet, stir together cream and lemon juice. Add the butter and turn on medium heat and stir until the butter is melted. Add the remaining ingredients. Cook on low heat until the sauce thickens. Stir constantly so it does not burn the bottom. Once it has thickened, add the pesto and heat through.

I used store bought ravioli from the refrigerated section. I bought the Buitoni mushroom kind. I really want to make my own ravioli one day. I will let you know when I do!
 
Thumbnails powered by Thumbshots